LEARN TO MAKE A BEGINNERS SOURDOUGH BREAD
I am often asked for a basic sourdough recipe, and for the cost of making a sourdough boule – it can cost very little – but in so many ways I am somehow reluctant to give a sourdough recipe because a recipe in itself really does not guarantee a good loaf. However, I have written this easy-to-follow sourdough recipe for beginners.
Whether you’re just starting your sourdough journey or looking to perfect your technique, this step-by-step guide will help you create delicious, airy loaves with a crispy crust. Unlike regular bread recipes, sourdough baking involves natural fermentation, bringing out incredible flavours while supporting gut health. This comprehensive guide covers everything you need, from creating a sourdough starter to troubleshooting common mistakes, so you can confidently bake artisan-quality bread at home.
There are many variables that affect a good sourdough bread, from the kind of flour, to the amount it is handled, to the weather on the day. These are things that I cannot account for in a recipe.
All the ingredients can be purchased in a convenient recipe box here from our partner site, DeliverDeli.
Learn to Bake Sourdough In Person
A Beginners Sourdough Loaf Recipe
The Sourdough Club is where we teach online how to make Dr Kimbell’s amazing bread. The club is the part of The Sourdough School where we share our easy beginner sourdough recipes, tutorials, tips, lessons and support you so that you can learn how to make Sourdough where ever you are.
There are many basic sourdough recipe posts online, some good and some not so good, but baking a beautiful loaf is about more than just the practical external factors. To make a really great sourdough you need the ability to judge the dough; to know it, understand it, feel it and instinctively correct or modify your technique on any given day. This takes practice, time, understanding and patience. The ability to judge these factors and allow for them is one of the things we teach on our sourdough courses. But more than that I teach people to understand sourdough. Once you understand sourdough then you will always bake a great loaf.
That said, nothing gets you off to a better start at the weekend that a warm crusty sourdough loaf fresh from the oven and there are many bakers who read this site too far away to attend a course. So this is my basic sourdough recipe; it is based on the French country Pain de Levain that I grew up baking in the village bakery in the South of France, and is timed so as to be ready to take out of the oven on a Saturday morning to bake.
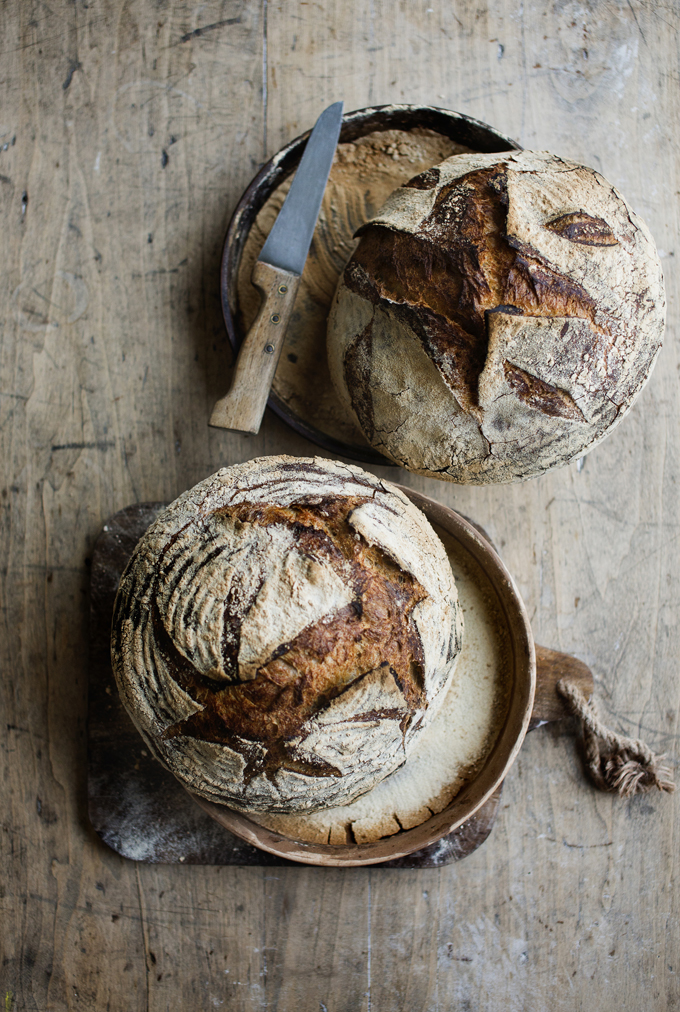
A traditionally French shaped sourdough boule. Allow yourself about 4 hours for the dough to be mixed, folded and shaped ready to place in the coldest part of the fridge to prove overnight. (If you are new to bread making, you can, instead of shaping the dough and putting it into a banneton, grease a 2lb bread tin liberally with butter, let the dough rise in it overnight in the fridge and then bake as per the recipe instructions below.)
Essential Beginners Sourdough Bread Making Equipment

A large mixing bowl
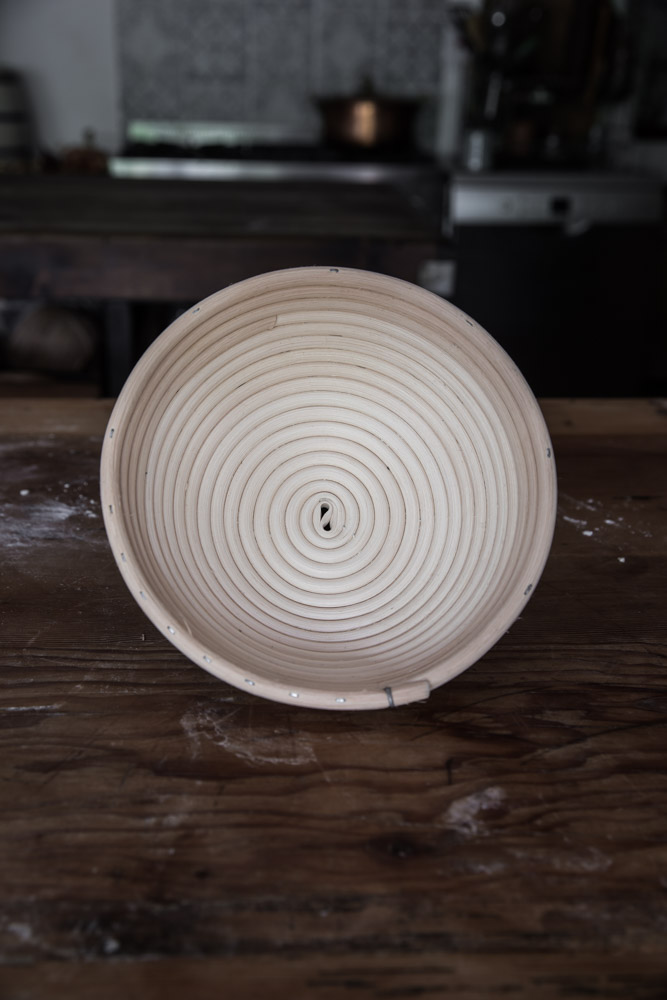
A round cane banneton
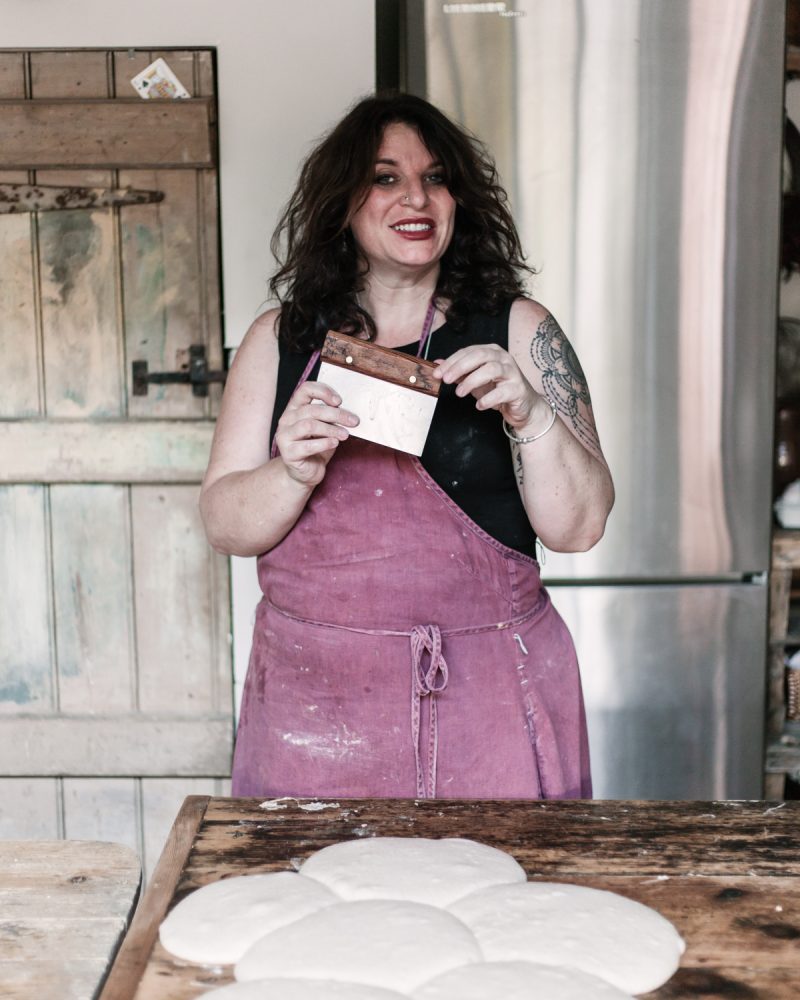
A scraper to shape with
2 clean tea towels
A Dutch oven, La Cloche or bread pan
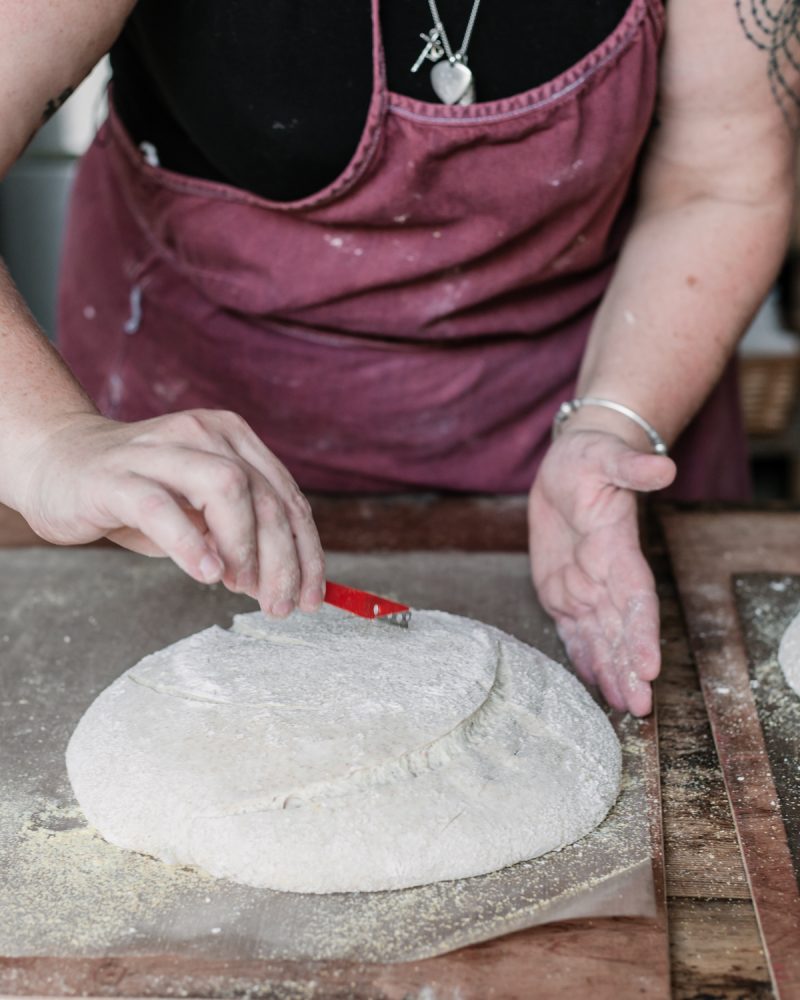
A large heatproof pan, a sharp knife or ‘lame’ to slash the dough with.
Ingredients:
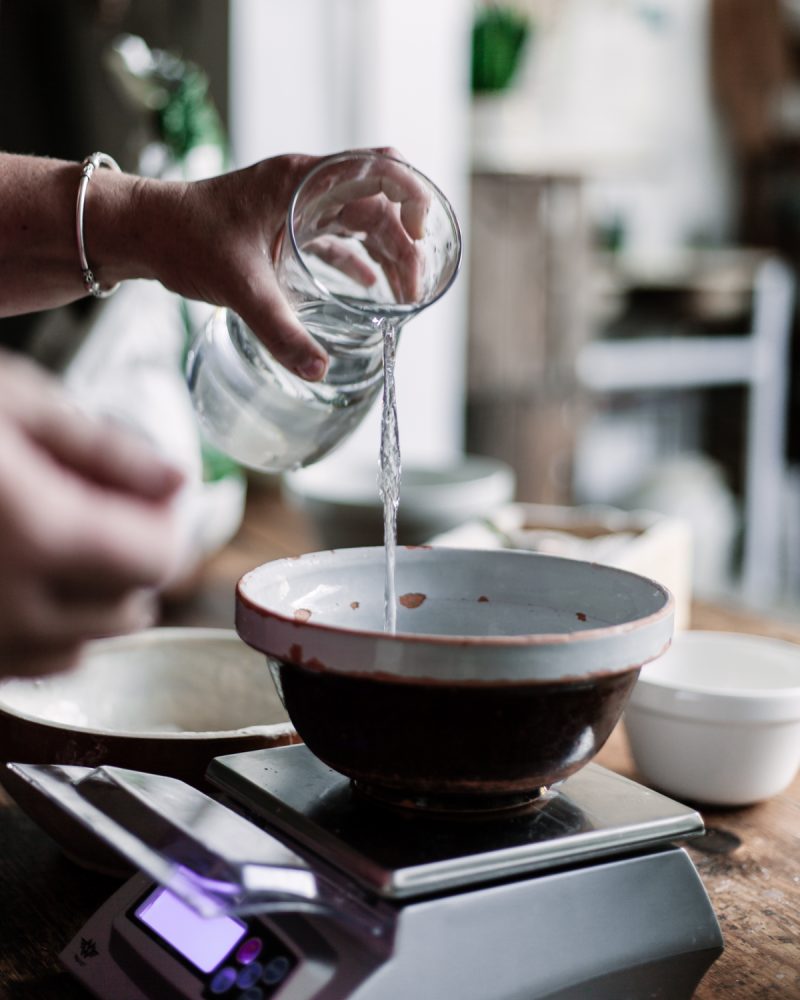
300g water @28C
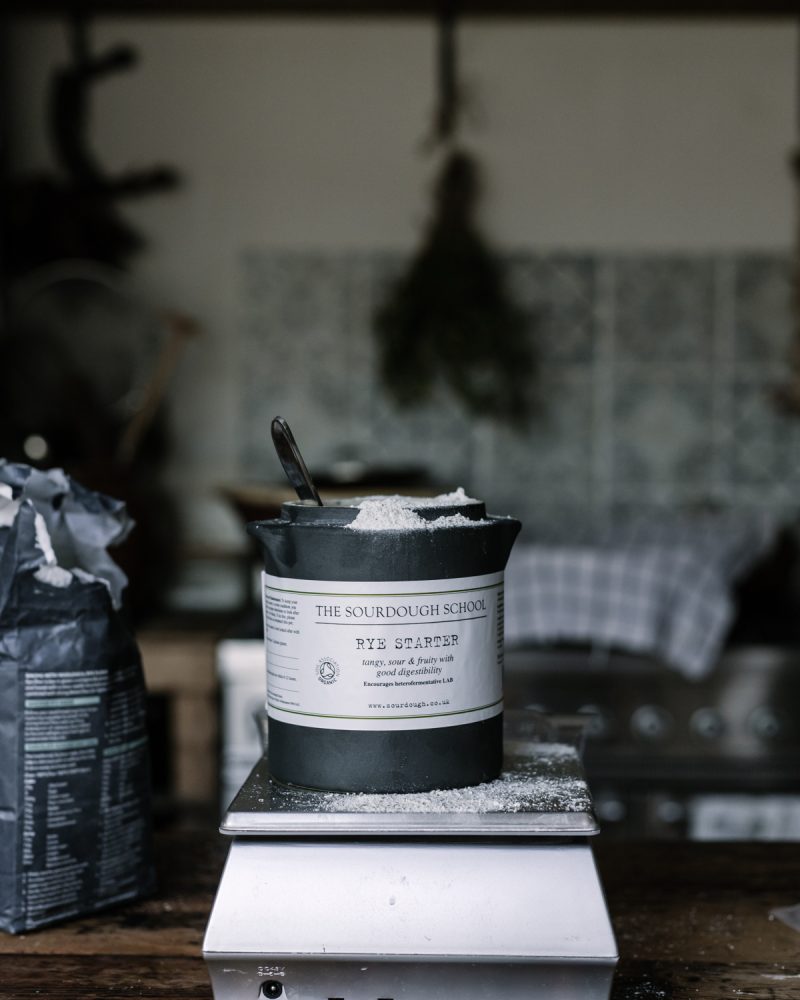
100g sourdough leaven* (made with your starter)
100g of stoneground organic wholemeal flour
400g organic strong white flour
10g fine sea salt mixed with 15g of cold water
25g rice flour mixed with 25g of stone-ground white flour (for dusting your banneton)
Semolina to dust the bottom of the baking surface
* To make 100g of leaven, use 1 tablespoon of sourdough starter, 40g of water @28C and 40g of strong white flour, mix well and leave, covered on the side in the kitchen in the morning. It will be lively and bubbly and ready to bake with in the evening.
Makes 1 loaf
Step by step Directions:
Late afternoon
Mix dough
In a large bowl, whisk your water and starter and mix well. Add all the flour and mix until all the ingredients come together into a large ball.
Cover with a clean damp cloth and let the dough rest on the side in the kitchen for between 30 minutes and 2 hours – this what bakers call Autolyse
Fold Dough
Add the salt mixed with the water and dimple your fingers into the dough to allow the salty water and salt to distribute evenly throughout the dough. Leave for 10 minutes.
Next, lift and fold your dough over, do a quarter turn of your bowl and repeat three more times. Repeat 3 times at 30 minute intervals, with a final 15-minute rest at the end.
Shape you sourdough
Shape the dough lightly into a ball then place into a round banneton dusted with flour (If you don’t have a banneton then use a clean tea towel dusted with flour inside a colander). Dust the top with flour, then cover with a damp tea-towel.
Prove Bread
Leave your dough to one side until it is 50% bigger then transfer to the fridge, and leave to prove there for 8 – 12 hours.
Bake the following morning
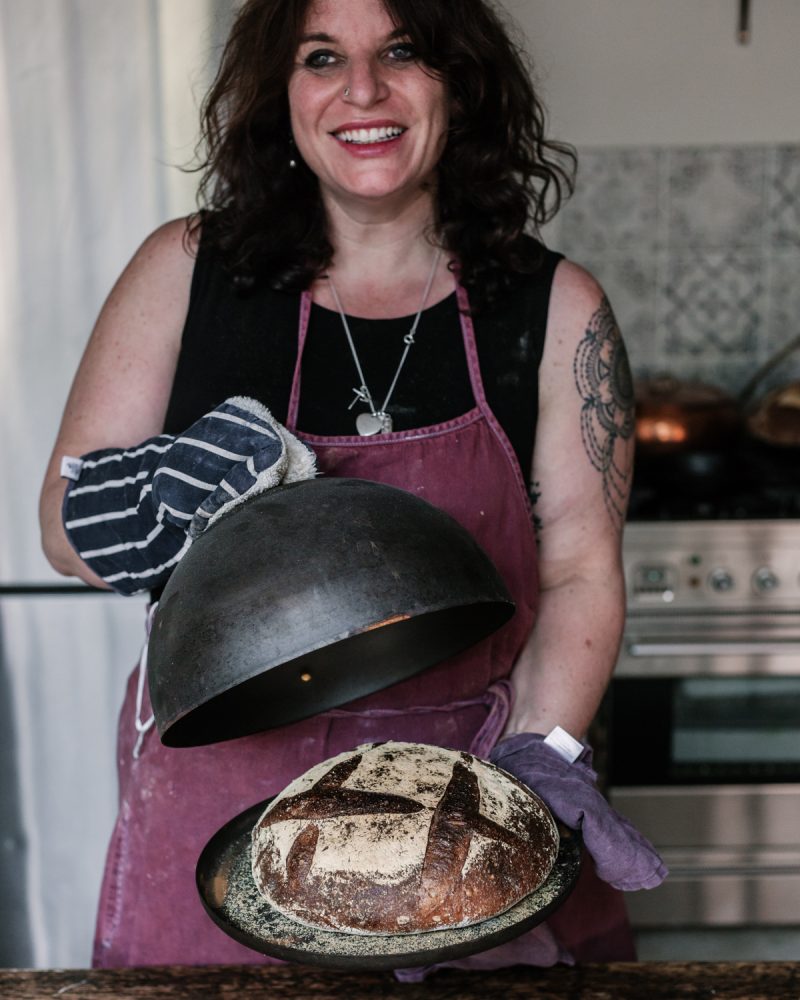
The next morning, preheat your oven to 220 °C for at least 30 minutes before you are ready to bake. Place your cloche or baking stone in the oven and a large pan of boiling water underneath (or use a Dutch oven). The hydration helps form a beautiful crust.
Once the oven is up to full heat, carefully remove the baking stone from the oven, taking care not to burn yourself dust with a fine layer of semolina, which stops the bread sticking, then put your dough onto the baking stone and slash the top with your blade. This decides where the bread will tear as it rises. Bake for one hour.
Turn the heat down to 180 °C (and remove the lid if you are using a Dutch oven) and bake for another 10 -15 minutes. You need to choose just how dark you like your crust, but I suggest that you bake until it is a dark brown – it tastes much better
Storage
Sourdough is really best left to cool completely before slicing, and is even better if left for a day to let the full flavour develop.
Once your sourdough has cooled, store in a linen or cotton bread bag, or wrapped in a clean tea towel.
Note: if you don’t like a crunchy crust on your sourdough bread, simply wrap your bread in a clean tea towel whilst it is still warm.
Troubleshooting Sourdough Bread: Common Problems and Solutions
Sourdough baking can sometimes feel tricky, but with the right tips, you can master the craft. Below, we’ve compiled a detailed guide to solving the most common issues bakers face when making sourdough bread. For more inspiration, explore our healthy bread recipes or check out our sourdough courses to take your skills to the next level.
1. Why Is My Sourdough Bread Dense?
Cause: A dense loaf is often the result of underproofing, weak gluten development, or an inactive starter.
Solution: Make sure your sourdough starter is bubbly and lively before use. Discard ¾ of your starter during feeding to refresh it and use warm water (27°C) to activate the yeast. When mixing your dough, aim for a Desired Dough Temperature (DDT) of 27°C to optimise gluten development and yeast activity.
2. Why Isn’t My Sourdough Starter Rising?
Cause: A starter that doesn’t rise is usually inactive or kept at too low a temperature.
Solution: Feed your starter consistently and keep it warm (24–27°C). Ensure it’s lively and bubbly before use. When preparing dough, aim for a Desired Dough Temperature (DDT) of 27°C for optimal fermentation.
3. Why Is My Dough Sticky and Hard to Handle?
Cause: Sticky dough often occurs when too much water is added too quickly, preventing proper gluten development.
Solution: Add water gradually during mixing to allow the gluten to form properly. The dough should feel thick and cohesive at the start to prevent soupy consistency.
4. Why Is My Sourdough Bread Flat?
Cause: Flat sourdough is usually caused by overproofing or starting with a weak starter. Excessively warm dough can also lead to overproofing.
Solution: Proof your dough for the correct amount of time, avoiding excessive warmth during the process. Use water at 28–29°C when mixing to activate the yeast. If your loaf is heavy, revisit your starter’s health and ensure it’s bubbly and active.
5. Why Does My Bread Have Large or Uneven Holes?
Cause: Uneven holes can result from improper mixing, overproofing, or shallow scoring.
Solution: Ensure water and salt are fully incorporated during mixing. Avoid overproofing, which can lead to gas pockets, and make deep, confident scores to guide the rise in the oven.
6. Why Is My Crust Too Hard or Too Soft?
Cause: Crust issues are often caused by improper steaming or an unsuitable baking environment.
Solution: Bake your bread in a cloche or Dutch oven to retain steam, which helps create a thin, crisp crust. Allow the bread to cool completely before slicing to set the crust.
7. Why Is My Bread Pale in Colour?
Cause: Pale loaves often indicate under-fermentation or insufficient baking temperature.
Solution: Ensure the dough ferments properly and bake at a high temperature (230–250°C) for a rich, golden crust.
8. Why Does My Bread Taste Bland?
Cause: Bland bread can result from short fermentation or insufficient salt.
Solution: Extend fermentation to enhance flavour and ensure you’re adding enough salt (2% of the total flour weight is standard).
9. Why Is My Bread Gummy Inside?
Cause: Gummy bread is often caused by underbaking or overly wet dough.
Solution: Bake until the bread’s internal temperature reaches 95–100°C. If the dough feels too wet, reduce hydration slightly.
10. Why Does My Sourdough Crack Instead of Rising?
Cause: Cracking is often due to poor scoring or insufficient surface tension during shaping.
Solution: Score the dough deeply with confidence to guide its rise. Focus on shaping the dough tightly to create surface tension for even oven spring.
Take Your Sourdough Skills to the Next Level
Now that you’ve tackled these common sourdough challenges, explore more healthy bread recipes or consider joining our sourdough courses to deepen your knowledge and skills. Happy baking!
- More advanced recipes and tips are available to members of the sourdough club.
Learn to bake this sourdough on our online course


 Sourdough School Book Club Discount
I’m a longtime sourdough baker looking to try new recipes, and The Sourdough School cookbook has been on my desk, wonderfully tempting. I’m ready to try the Classic 50/50, but am unclear about your intention for adding salt and water (on page 98). Steps 1 and 2 say to add salt and then water. On the same page the Eau de Bassinage sidebar instructs to add water 20g at a time and then add salt when the last 45g of water remains. Below that the Retarded Salt Technique has me add salt and then water using a bassinage. It seems confusing — each is slightly different. What do you suggest? Salt first, then water, or vice versa? Thank you!
I’m so sorry I missed this. So a section in the book was edited out. I basically day-to-day when I make my bread, I add the salt at the end it tightens the gluten but if you wants
to add in early that’s fine. It just slows down the rate of fermentation , which is useful if it’s warmer weather.
Well thought out recipe and clearly explained. However an autolyse is just flour and water – what you have described is a fermentolyse.
Best,
Bob.
Layargaming Hi there! Should I bake for an hour at 220 if I’m using a tin? I’ll be making this recipe for the third time; I really enjoy it, however I find that the crust turns out to be rather dense.
Try adding a little steam in the oven when you bit the bread in and make the crust soft wrap the bread in a tea towel when it comes out of the oven and it will sty soft. Also you can add a tablespoon of mill powder and this also softens the crumb. Happy baking. x
HLK88 It truly depends on your flour. It’s similar to asking how quickly a car moves while you’re driving it. Simply tweak the hydration a little bit to see what works best for your flour.
Dear Vanessa,
I am a new sourdough baker and am becoming a serious enthusiast. After doing tons of research on the web and watching countless YouTube videos, I came across the beloved Nicole Jolly who referred to your book in one of her videos. After purchasing your book, I‘m finding myself “nose deep” through many hours of my days.
My biggest question after doing my research and reading tons of recipes and methods, why do you bake your sourdough at 350 degrees? Everything I read is 450 degrees and plus and I’m just so curious why you choose 350? Thank you for your time!
Hi Megan thank you for your question. You can now speak with Vanessa live at 4pm on Thursdays via Zoom. Please do submit your question here for her. We hope you can attend. https://thesourdoughclub.com/speak-to-us-live/
I like looking through a post that will make people think. Also, thank you for allowing for me to comment!
“Wow! At last I got a blog from where I be capable of actually get helpful facts
concerning my study and knowledge.”
Thank you for this well-written and well-organized post. You answered all of my questions about baking with oat flour.
Hi Vanessa,
Having been given some well-established starter (Babs!) by a friend, I have bought your fantastic book and want to learn to make really good sourdough. So I will be trying your first recipe for boules 5-7 times and fill in record sheets as you recommend, so that I can really get to know Babs and understand how she behaves!
The first attempt hasn’t been a great success (though the flavour is glorious!), so about to try again this weekend.
I think I am being a bit dense (like my loaves!) about the bassinage. How long do I wait between the additions of 25g water. And most importantly, when do I do the bassinage in relation to the autolyse? On my first attempt I assent the bassinage water over about an hour, AFTER the autolyse but before the addition of the salt. But now I am wondering that was the wrong moment? I am wondering whether it should be done before the autolyse, or at intervals during the autolyse?
Please help!
(And thank you for your amazing resources both online and in the book. I love how you explain the science, but also evoke the art and instinct of baking!)
Thank you!
Anna.
Hi Anna. So glad to hear you are excited to get started making sourdough! For the bassinage, it is actually considered part of the mixing process and takes place between the autolyse and before doing your folds typically. So you can divide the final water quantity into 3 separate additions, and do the first two additions at least 5-10 minutes apart to allow the gluten strands to relax. Then the final addition of water is when you add the salt. So it sounds like you were not too far off. If your loaves were on the denser side, this could be for many reasons but often it is because the starter needs to be double refreshed to ensure that it is lively and active. Let us know how you get on! And if you aren’t already, consider becoming a member of our online course the Sourdough Club for more help. There are extremely helpful video tutorials, lessons, tons of additional recipes and there is also an online Facebook forum for troubleshooting and regular feedback from Vanessa, her team and other bakers 🙂
Hi Vanessa! I’ve been working my way through your book and have baked nice breads so far. I have a question about when to use the leaven. Most websites say when it’s doubled, but from the instructions in your book I gather I have to use it only 2-4 hours after it’s made, when it’s only started to rise. Is that so? Or do I wait the full 7 hours until its doubled to use it?
Hi Martin – great to heat you have been making nice bread. For leaven it depends if it is an ambient or a retarded loaf. For dough that sist in the fridge you need a fast leaven – so rye/ wholemeal that has not yet doubled.
Hi, I hope you are keeping well. I hope you have managed to rest over the weekend as I saw your clip on Instagram saying you were knackered.
Any how, thanks for this awesome site dedicated to sourdough. I have been making this dough a couple of times. The 1st attempt it was amazing. The next 2 times have been OK. So after a bit of clarification like the Martin above.
Making and using the leaven in this recipe. I have a starter which I use 90% white bread and 10 % wholegrain rye. So I feed my starter from the fridge, leave it out until doubled in size, then take 25grams of this to make the leaven? Then use this once it has doubled in size?
The autolyse stage which has a period of 30 minutes to 2hrs, is there a certain room temp that dictates this?
DDT: is around 26c. My house is around 18 c most of the time, I calculated I would need to add 47c water. Would this be ok? Eventually my dough would go to room temp before the final fold and 15 min rest. How do you keep your bread at a consistent temp for the proofing stage?
With the folds, do you stetch the dough from the corners and into the middle or do you pick the dough up from the bottom in the middle and just let it fold down on it’s self?
If you do have time to answer my questions that would be great. Or if anyone else can that would be great as well.
Thank you
Hi Lee, a lovely message and great to hear you are finding this resource helpful – there is a lot more information and video tutorials in the The Sourdough Club if you want to learn even more. To answer your questions, make your leaven from double refreshed starter – the leaven is really important and because this is a retarded loaf, the leaven is used while young – a bit before doubling. You will get a much better rise in your loaf if you can get closer to the DDT during autolyse and proofing – not by adding hot water which will kill off the starter but by fnding a warmer spot in your house – in front of a radiator, some ovens are just the right temperature with just the oven light on, use something to insulate the bowl, put the bowl in warm water – etc. Stretch and fold outside edges up and over to the middle. Others may be able to help with how they maintain DDT in their kitchens. I hope all this helps and happy baking!
Hi, I found your recipe for making the leaven only made about 75g rather than 100g for me. I ploughed ahead anyway but my dough hasn’t risen at all. I will bake it anyway but I’m not sure what’s gone wrong !
Hi Natalie, You do need to use a double refreshed starter to make your leaven and to use it when the starter and leaven are in peak condition. If you want to learn much more then do consider joining the sourdough club: https://thesourdoughclub.com/join-the-sourdough-club/ where there are lots of tutorials and a very supportive forum.
I have tried this recipe and it was fantastic, a couple of hit and miss attempts since but still my most successful bread so far.
I’d love to know if the recipe can be done as bread rolls, rather than a full loaf? How would I adjust for that?
Hi Jenny you can always shapre dough to bread rolls. Use about 100g per roll, using your hand over in a circular motion roll the dough ball to form tension on the surface. Leave ro rise ans then bake for about 15 – 20 mins depending on the flour, your oven etc.
Thank you, this recipe is a definite go to. I do it in a loaf tin so changed a couple of things like amount of water and oven temp. But I’ve had nothing but success, it’s been a real boost to my confidence.
Hi Vanessa,
I’ve been making sourdough for a while, my starter is good and healthy, and I’ve been making some decent bread following different methods and a bit of experimenting.
I came across your basic recipe here and my first loaf is an absolute triumph – I don’t think I’ll be looking any further!
It is a slightly longer process for me, but I’d say it is more about a little patience than it is labour intensive. The rise blows away any other loaf I’ve made – it’s the first time that I’ve been really happy to achieve a beautiful boule shape – and the aroma coming from it is incredible!
I’ve used my usual method of baking the loaf in a large Pyrex casserole, inverted so that it bakes on the lid and the dish becomes a cloche that can be removed for the end. I shaped it as usual in a round Pyrex mixing bowl (I like Pyrex?) lined with a floured tea towel, and at this time of year when the fridge is pretty full I just popped it out in the garage last night, where it’s easily as cold as any fridge! I’m interested – is there a reason why you suggest using a colander for that stage? Does the dough benefit from a little air getting to it?
My only other question is – folding wasn’t as easy as I expected, not a lot of “give” to the dough; I guess that’s due to differences in flours. Next time would you suggest I increase the hydration? Im thinking 355ml water would give an overall ratio of 75% wet to dry ingredients. I’m used to working with a slightly wetter dough.
Thank you very much for this fantastic recipe (you won’t beat the French in the kitchen will you!)
Have a great Christmas…
Hello Dom thank you for your kind message and it is great that you have had success – such good news. Using the Pyrex bowl for your shaping is fine – a colander works as well, there is not much difference. With the stretch and fold it is important not to tear the gluten so be gentle, this is a very basic recipe for beginners so not too high a hydration level. If you are ready for more advanced baking please consider joining the Sourdough School: https://thesourdoughclub.com/join-the-sourdough-club/
Hello Vanessa,
I don’t have a cloche or a Dutch oven, what can I do? Should I leave the pan of water in the oven for the entire hour? I have been using another recipe (75% hydration), I would like to try yours but I don’t know how to bake the dough.
Currently I heat up my fan-assisted oven at 230C for one hour, place the dough with the pan of water, take the out the pan after 9 minutes and bake the dough for another 21 minutes.
Thanka for your help!
Hello Raluca, I would keep the pan of water in the oven, just taking the pan out after 9 minutes will cause the temperature to drop at an important stage. There are lots of tutorials on baking, recipes and much more in the Sourdough Club: https://thesourdoughclub.com/join-the-sourdough-club/ Happy baking Vx
Hi
I have made 2 loaves following this basic recipe and they have both been fantastic! I have tried making sourdough bread many times before with varying results but these have been my best results by a long way. I am really thrilled to have succeeded at last! Thank you so much
Hi Sheila and lovely to see you rmessage. Keep baking!
Hi Vanessa
I like your website snd approach to sourdough and food in general very much.
I’ve got two questions.
1. It looks like ou give 2 different recipes for refreshing your starter have i misunderstood something ?
25g starter plus 40 g water plus 40g flour 8-10 h (on page with boule recipe)
then
25g starter 100g water 100g flour 8-10h( on page with how to refresh starter)
2. Can I do final mix with 3 folds and leave to bulk rise in a cool room (10-12C) over night and shape and proof for 1.5 to 2h in morning? If i can coukd i mix still starting at about 4pm?
Thanks in advance for your help.
Dede
Hello Dede, For the starter question, how to refresh a starter is for maintenance of your starter, from this you make a leaven. The boule recipe makes a leaven using this starter at a different ration because this is a leaven for a retarded loaf. There is a lot to learn with sourdough and we cover all of this and more in the Sourdough Club.
If you would like to learn how to make sourdough online with every detailed element included we have the Sourdough Club https://thesourdoughclub.com/join-the-sourdough-club/ with over 40 sourdough recipes and over 70 video tutorials covering every step and support from Vanessa as needed. It is a membership website.
Hi Vanessa, thank you for your sourdough recipe, I have been trying to make sourdough bread without much success including breaking a ceramic hob with the lid of a heavy casserole dish which I was using as a Dutch oven. I found your recipe after searching for a “foolproof sourdough recipe”, I was prepared to give it one last go. I am pleased to say my sourdough loaf is lovely, I shall only use your recipe from now on, thank you again
Thank you Chris and that is great news! Sorry to hear about the ceramic hob…
Hi Vanessa,
What temperature water do you use for the first part of this recipe?
Thanks
Teifion
Hi Teifion, you are looking at reaching a desired dough temperature (DDT) of between 25 and 27C. V
I notice your recipe fails to mention whether the dough is brought to room temperature before baking or is placed in the oven right out of the refrigerator and still cold?
Hi Joe, the dough goes into the oven straight from the fridge. There is no need to bring it up to room temperature. V
Hi, can you replace the organic wholemeal flour (100gm) with (100gm) organic rye flour?
Or a different mix using same method?
Best,
Hi and yes you can replace wholemeal with rye with this recipe. V
Hi Vanessa, after I score my loaf it deflates. Is there anything I can do to change this? Is it as simple as just not proofing for as long?
Hi Michael, that sounds like it is over proofed. Take care that you use a cold part of your fridge overnight. Domestic fridges tend to be hotter at the top. colder at the bottom. Vx
Thank you so much!
Hi Vanessa,
I really hope you’re well.
I’ve been using this recipe since I started baking sourdough and it’s been a 10/10 recipe since the first bake, so thank you – everyone I have made this loaf for has loved it.
I have recently changed flours from Waitrose’s Leckford Estate flour to Shipton Mill as almost every baker I speak to in the South West seems to swear by it. I have found it to be quite a challenge to work with; not only is my starter not nearly as lively as it was with the supermarket flour, but it seems to make a much firmer dough that tears at the “stretch and fold” stage rather than being beautifully elastic as it was before. That being said, it makes a much nicer tasting loaf!
Every person and their dog (and cat and mouse and guinea pig) on the internet seem to have an opinion on sourdough that they swear by but that conflicts with what the next person says (and I probably have to include myself in that as I just point everyone in the direction of this article whenever I’m asked!) so I though I’d ask here; do you think the tearing would simply be solved by adjusting the volume of water used to something Shipton Mill flour seems happier with and should I be concerned that my starter doesn’t seem to like it’s new diet?
Many thanks for your time,
LB
Hi LB and it’s great that you have been making such good bread with this recipe. You will find that every flour is different and you may have to adapt if things have changed. Each flour may have different protein levels which will affect the gluten structure and how you handle the dough. I suggest you start by getting your starter really active – refresh up to three times so that it is bubbly and lively. Without a starter at peak condition the dough will not be fermenting correctly. Do adjust hydration if you think the dough needs it. You do not want the dough to tear when stretching and folding – treat it really gently. We go into much more detail in our tutorials in the Sourdough Club but I hope this guidance helps you make a better loaf next time.
Thanks for taking the time to reply, I really appreciate it. Baking is a little hobby I enjoy so it’s horrible when it stops being enjoyable and gets frustrating! All the best.
Hi Vanessa
I am slowly working my way through your book, but when things don’t go quite right I always rebuild my confidence with this recipe. I was wondering what you thought of the coil technique v the stretch and fold.
Hi Elaine. Good to hear you are gaining confidence and practicing making dough. You ask about the coil technique. Well every single baker has a different method and there’s no right or wrong way but I personally feel that over stretching and folding enthusiastically is one of the contributing factors to having a tight structure in your dough. I often see beginners making mistakes simply by enthusiastically over handling the dough. If you want an open and voluptuous crumb structure then, in my 35 years experience of making dough, the gentle stretch and fold is my preferred technique – but there is no right or wrong way, do whatever makes you feel good. Vx
Thank you that’s really helpful. I really appreciate you taking the time to reply.
Hi Vanessa
I have your book and, like the recipe above, it says to autolyse for 30 mins to 2 hours, but I’m not sure on what basis I should decide whether to leave it for 30 mins or the whole 2 hours (or anything in between!). Am I looking for something specific to happen which will let me know when to end the autolyse?
Also, I’ve tried the classic sourdough recipe few times (once with different flour to see if it made a difference) but the dough is always impossible to shape – it just spreads back out on the counter and will not keep its shape if I pick it up… any thoughts on the likely reason? I’ve tried carrying it through the process and baking it anyway and it rises a tiny bit and tastes alright but looks like a UFO. Any thoughts on the likely cause?!
Thanks
Hi Fay. With autolyse it depends if you have an ambient loaf or a retarded loaf, an ambient loaf can autolyse for up to 3 hours but a retarded loaf needs much less time, 30 mins to 1 hour. I always suggest using a loaf schedule record sheet to capture what you do and learn what works for you in your kitchen environment. This will help you with your classic sourdough recipe. Always make sure you are using your starter in peak condition and add water slowly to hydrate your flour. Vx
So, I am making your classic loaf (from your Sourdough School cookbook), and I just made the leaven (well actually three of them) with rye flour. With the first one, I followed the recipe to a T. For the second, I added an additional 50g water to make it closer to the consistency of the picture. For the third, I mixed 120g starter, 60g rye flour, 60g water. This was the thinnest one.
Should I go by picture (thinnest) or by the recipe (thickest)? Help!!
Hi Kaitlyn, I would use the recipe amount: 25g sourdough starter, 100g rye flour and 100g water. If you increase the water the starter will grow even faster if you add more starter the nutrients will be used up more quickly. Most important is that you use a starter when it is at it’s peak and that you use the leaven when that is at it’s peak. All flours are different and your water and room temperature will also make a difference. Vx
Hello Vanessa, I have been making this boule now since the beginning of lockdown and it has never failed me – thank you so much and I’m a novice baker too:) I wanted to ask you your advice about making two boules; could I just double the ingredients for the leaven? So 1 tablespoon – 25g would be approx 50g? And then double the other amounts. The same for the boule itself etc? Thanks. S
Hi Sophie and yes that is right, just double up. Glad you have been making wonderful bread! Vx
After attempting various sourdough recipes throughout lockdown, I’ve finally had success with your recipe! Put a smile on my face all day ?
Great news Joe, well done! V
I may have missed it somewhere but do the temperature settings 220 and 180 apply to fan or non fan ovens.
Hi Gary – non-fan ovens
I’ve an experienced sourdough baker but recently has a few failures. I thought I’d try this Basic recipe and it worked out perfectly. My bread has an amazing rise and shaping was super easy. Thanks Vanessa!
Great to hear that the recipe worked well for you Susan. Thank you for letting us know!
Hello Vanessa
Although I’ve been baking bread for over 40 years this is my first sour dough attempt. I have not got a bakers stone or cloche, but I do have a very large Le creuset cast iron casserole. Could I use this to bake the bread in if I preheat it?
yes
hello, I’m waiting for your sourdough to arrive. I’m so excited. I live in Italy and I’m a bit confused regarding strong bread flour. Is it tipo 1 or Manitoba or 0? can you help me? any recommendation? thank you very much.
Use tipo 1
Hi Vanessa !
Today I’ve received my first Dutch Oven, so I want immediately to test it with this recipe.
I’m new to sourdough, so I’ve a question in order to establish my schedule… How many time is more less needed to make the dough rise about the 50% before putting it into the fridge?
Hi Greta. Timings will vary slightly but we usually allow three hours at a DDT of about 26C before putting the dough in the fridge. Hope this helps.
After some inconsistent results with other recipes, I tried this one. Spectacular results first try
Hi Vanessa thanks for your great recipe and instructions – I had a failed loaf yesterday with another recipe and today success with yours. I have a great rise and the loaf looks fantastic. The dough is slightly damp – have I cut it too soon? Also, how can I stop the crust on the bottom being so tough?
Thanks again.
10g of olive oil in the dough & wrap in a tea towel as it comes out of the oven.
Vx
Thank you for sharing.
Leaven – how many tablespoons of starter?
HI Donna – To make 100g of leaven, use 1 tablespoon of sourdough starter, 40g of water and 40g of strong white flour, mix well and leave, covered on the side in the kitchen in the morning. It will be lively and bubbly and ready to bake with in the evening.
Best
Lucy
Hi Vanessa,
After several failed attempts I came across your recipe and gave it ago. My loaf had just come out of the oven and I can’t believe how perfect it is! I followed your very easy to understand recipe to the letter. The only thing I did different was to grease a mixing bowl with flavourless oil for proving as I didn’t have semolina or rice flour. Such a fantastic recipe that really does break down the process. Can’t wait for loaf #2! Thank you so much, James.
James that is lovely – thank you for telling us. Happy baking.
Vanessa
I tried several recipes, and this one came out very nicely. The levee based on my starter (just 2-3 weeks old) was quite active (2-3 times in two hours), and the only thing I was forced to change was that I baked directly from the Dutch oven that I put in the fridge for 8h. Great oven spring, crusty sound. I baked quite a few sourdough breads lately, but this one was the best so far.
Dad baker.
Thank you Mikael, so pleased 🙂
Thanks so much for this recipe!!! I made sourdough starter a while ago but always stuck to simple recipes — pancakes, tortillas, flatbread — because I was too intimidated by “real” bread. In the swarms of this pandemic, I figured I’d give this a go just to see and it turned out great! After having a slice, my husband just said, “if we bought this at the farmers market, we’d be really happy with it”…so that’s a vote of confidence! Thanks for sharing such an accessible sourdough recipe with us beginners. Can’t wait to make again!
Hi Vanessa.
How long roughly does it take for the sourdough to get 50% bigger before putting it into the fridge? Are you talking hours? I can’t start the process in late afternoon, the earliest probably 7pm ealiest, but don’t really want to be waiting up till the wee hours waiting for it to rise enough to refrigerate.
Thank you.
It will usually take about three hours at a DDT of 26C.
This recipe is brilliant!! After many failed attempts at sourdough, by following these instructions I managed to produce a delicious loaf, and the timings fit perfectly with my life – thank you so much for sharing! I would love to attach a picture, but don’t know how to! One question – I am struggling to purchase the correct round banneton for this size loaf – are you able to advise please?
Om Womans Hour this morning you mentioned you ‘killed off’ your starter when moving house. How did you start/make your new starter to your old recipe ?
Hi Roger it was the person that wrote in that killed their starter. I am not guilty of such a crime of neglect!
Best Vanessa
On Womsns Hour this morning you mentioned you killed off your starter with moving house – what/how did you make your new “starter” ?
Hi Roger it was the person that phoned me not me ..
See LEARN in the menu for details on how to create a starter..
best Vanessa
Hi, we’re in isolation and can’t buy strong white bread flour for love nor money! We have plain white flour and spelt flour. Will this be ok? Thanks.
Yes. You could try cereal & use milled porridge oats in place of whole grain flour. .. it will be a bit denser but far more delicious and nutritious.
V
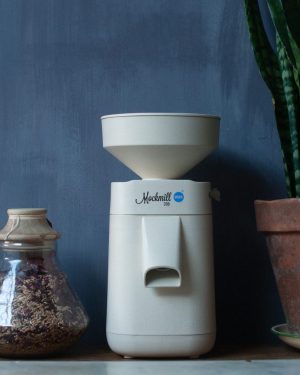
Hi Vanessa, I have just received my new Mockmill! My farmer friend has provided me with milling wheat of 12.6% protein and a hagberg of over 300 – can you explain what effect the hagberg has (if any ) on Sourdough bread?
Thank you
John
I tried my first one – instructions were too complex and it came out looking like the inside of an ice cave! All big and hollow with spiky bits at the top. But then I tried your recipe – i went to bed beaming coz it was great (though it took long to get a 50% rise (warmed the bowl up on my lap in the end 🙂 ). I am so pleased with the results – itching to make my next one.
I can only get my hands on whole-meal flour now, I have a little strong white flour left, and quite a lot of self-raising flour, what adjustments would you suggest to the basic recipe itself?
Can we bake sourdough without proving overnight?
Yes, just switch the timings over.
Refresh your starter twice the day before. Mix about 8am .. leave to prove during the day and bake in the evening.
My oven has a proofing function. How would I use that with the recipes? I love your book by the way!!! Super educational!
I have no idea. everyone has different ovens and unless I come to your house and bake who knows? I am locked down so your best bet is to try it .. if it fails to look good then use a cloche.
Vx
Hello! I’m just about to make this but only have a trusty rye starter. It’s been going strong for one year. Can I use this? In your opinion, is it OK to use rye starter for white and wholewheat breads. I love these recipes! Thank you.
Yes. Totally fine.
Vx
After 1 failed attempt with another recipe I tried this one with a hesitancy but a positive attitude. I followed the recipe to the letter and the loaf came out great and restored my hope in sourdough baking. Thank you..
I’m working my way through your brilliant book. In that, you suggest preheating the oven to 250C if it will go that high, reducing to 180 when the bread is in the oven. Your basic recipe on the website suggests 220C initially. Is the difference important?
Hi Martyn,
The Basic recipe is a domestic version. Most domestic ovens don’t go much above that. The book had to accommodate the fact that many professional bakers use it. So it is a bit more advanced than my basic. Here I load hot then drop the oven, but I use a Rofco. You will have experiment to find what works for you in your oven.
Best
Vanessa
Vanessa, pls, which Rofco model do you use?
Hello – it is a Rofco B40 model. Vx
Hi, how would you adjust this for a Spelt Sourdough loaf.
Thanks,
Nige
Spelt really doesn’t have the strength to stand up as a boule unless you really are an advanced Baker I suggest putting it in a tin
Thanks , I have just been looking for information approximately
this subject for ages and yours is the greatest I have came upon till now.
But, what about the conclusion? Are you certain concerning the supply?
Hi Vanessa
Great website!
I am about to bake my first loaf after having bought a starter on the internet. It’s been going now for 3 days with the flour and water that I have added after discarding some and is bubbling away nicely and smells good!
I’m confused… is this what you call the leaven or is this still called a starter?
Apologies if this is a really stupid question.
Jane
Please refer to the glossary.. it in the tabs in the menu..
Hi Vanessa,
what is the difference between this basic recipe and the chart for The classic white sourdough boule in your book ?
Many thanks …
Hi Vanessa – what a lot of information you were able to relate in such a short time on this am’s Womans Hour – wow – I now understand my body in such a different way – so informative, thank you!
I cannot find where the recipe is for the “starter” – have found some online but not sure I trust them!
Can you point me in the direction of yours please?
Hope you don’t mind me pairing a reply. I made a starter just using ordinary plain flour and water and it worked fine. Equal quantities of water and flour, mix well, leave for 24 hours. Take about 50g of this and add 50g more flour and 50g more water. Do this every day for about 3 or 4 days. Then switch to 12 hour feeds. Ended up with a lovely lovely starter and baked a delicious loaf with Vanessa’s recipe.
Hi, I’m poor and can’t afford a cloche or a dutch oven at this point. Would it work ok in the big cast iron casserole dish we got for our wedding? Also, I prefer the taste of rye and spelt flours, would I need to adjust anything for those?
Made this today and it is a great ‘go to’, no fuss reliable recipe. I put dough into fridge overnight then shaped and into banneton in morning for proving. Thanks! pic IG @simply_sourdough
Thanks to your recipe I am now making very nice sourdough bread, which both looks and tastes good. However, I do find that it goes stale very quickly. I quarter the loaf and store three of the quarters in the freezer as it goes stale overnight. I store the fresh bread in a polythene bag in the bread bin. Also find that it is absolutely at it’s best on the day of baking or removal from the freezer by the next day it is dry. I always understood that sourdough was a better keeper than yeast breads. Am I doing something wrong.
Why do you prepare and use a leaven?
Cant you just use the starter that you have made
Thanks Joe
you need to build the strength of the microbes.
Hi,
I have been baking for years but only have done sourdough for a few months. I was getting good results with a recipe I kind of made up and suddenly everything would go wrong. I decided to start from scratch and found this recipe. Made it last night and just took the lid off of my bread in the DO but it’s still baking but I can tell it’s turned out great! I wasn’t sure whether the fridge proving needed to be covered so I went with covered. I got good oven spring. Obviously haven’t seen the crumb yet but I’m not fussed about it. I just want nice tasty bread for my family as I can’t get anything decent where I live. The bread rose beautifully and even if I didn’t get holes, I know the bread will taste awesome. The whole house smells like a bread shop. Thank you. Oh, I found I needed to add a bit more water to make the dough workable but as you said that comes down to feel and flour and temperature. Thanks again!!!
I love, and am inspired by, your Instagram posts. I’ve been sourdough bread baking for a couple of years, and have had some good successes. I’m exited to try your basic sourdough recipe this weekend. I have one concern: the bake times. All my experience to date has had bake times of 20 minutes covered, then 20–25 minutes uncovered. Your formula calls for 70 to 75 minutes. Your oven temperatures are a little lower, but not by that much. Can you reassure me that I won’t end up with burnt or dried-out bread? I converted your celsius temperatures to fahrenheit, and arrived at 430 degrees covered for one hour, then uncovered for 10 to 15 minutes at 355 degrees. Did I miscalculate anything? Thanks!
Vanessa, I will be coming on one of your courses very soon. I have been using Mr H’s overnight sourdough recipe. I am going to have a go with this one. I have a cloche but my problem is oven temperatures. I have an Everhot range oven (storage heat) so it is not possible to turn down the temperature easily. Do you have any suggestions. I am baking at a far higher temperature than you recommend. Results are reasonable but I think there is definitely room for improvement.
Well perhaps try baking for less time .. I often bake at 240 and drop to 200 ..
Love this recipe, have baked about a dozen loaves using it and always delicious. Question: even with making large slashes before baking, the loaf expands so much that it “bursts” beyond the slashes. Any tips on what could be the cause?
It sounds a little over proofed .. so perhaps bake an hour earlier?
Hi, Last week I received my sourdough starter and cloche from Bakery Bits, made my first loaf using your recipe which was included. Have to say the loaf looked wonderful and tasted pretty good, however, I would prefer a more irregular open crumb. Can you tell me please how I could achieve this.
It depends on the flour you use and the amount of water you use. What flour are you using?
Vanessa, I’ve been baking Sourdough since last Summer and your two recipes, this one and the Friday Night one on the Bakery Bits website are the only two recipes which I’ve had favourable results with! So thank you for that 🙂 Just a couple of questions please: I’m trying the Marino Soffiata Type 00 flour next as I’d like a lighter, less dense loaf for sandwich type bread but worried about lack of flavour. Is it ok to go half/half with this and FWP Mathews Strong White stoneground flour so that I get the best of both worlds or do you recommend going all Soffiata? Also, with your Friday night recipe, is the salt correct? Its 10g but should it not be at least 20g, I find the loaf lacking in flavour because of it? I am tempted to add more however just want to check if its that little for a reason! Thank you!
Hi there,
Sorry if this is a stupid question – i assume when you say mix the bread that you don’t mean kneading it, just bringing it together. Is that right?
Many thanks.
Yes just bring it together very well so all the flour has met with water.
Hi Vanessa, thank you for creating a fantastic website, I have been inspired! and am in the process of making my very first sourdough using your recipe for both the starter and bread, my fingers and toes are crossed for the end result! I live in New Zealand and wonder is there a way to become a member without attending your courses as I would love to learn much more.
Hi Megan you candy the courses online – look under courses and find the online membership.
Kind regards
Vanessa
Hello,
Silly question, but should this be strong wholemeal flour or just regular wholemeal?
Thanks!
Craig
not silly – to is bread making flour so yes strong flour
Hi Vanessa,
I live in Hong Kong and only have a tiny oven! Do you think it would be possible to make this bread and halve the mixture before the overnight prove? Then bake it as two loaves?
Thank you.
yes I am sure this is fine. Although you might want to reduce the baking time.
I made a starter a few weeks ago and decided to try this recipe after having a disastrous experience with another recipe I found online. It was AMAZING! I was a bit skeptical about leaving the dough in the fridge overnight rather than letting it rise somewhere warm (which is what the other recipe told me to do) but the loaf turned out absolutely perfectly first time! Great trick to wrap it in a tea towel after taking it out of the oven too – it meant the crust was still crunchy but not so solid it would break out teeth! Such an easy recipe to follow and the loaf was gone within a day. This has now become my go-to recipe for an easy loaf
Thank you so much for sharing this! Happy baking. x
Thank you for this lovely write-up! My wife and I are enjoy my sourdough practice rounds. Each one is getting better 🙂 .
Hi,
I’m new to sourdough, after previously giving up on a white flour starter after very little activity after 10 days, I’ve now got a rye flour starter on day 4, yesterday it fre by 50% in 24 hours, so I think I’m getting somewhere! Can I make the recipe listed above with my rye starter and use white strong flour for the rest of the recipe? I’d rather not make a full rye flour sourdough ideally. If so do I need to adjust anything to work with a rye starter? Thanks.
yes it should be fine, but refresh your starter 3 hours before you make your leaven. Then make your leaven. Rye get acidic fast.
Vanessa, THANK YOU for sharing this wonderful receipe. I am a total beginner and was blown away by the texture, taste and crunchiness of the sourdough. Your easy to follow receipe made the whole process very easy. I look forward to more sour dough adventures and thank you once again for your web site and enthusiasm. You are a joy.
I have been trying, on and off, to make a good sourdough loaf for a long time and must have made enough artisan bricks to build a house. Your recipe seemed nice and clear, so I thought it was time to try again. I mixed up the leaven after your instructions and last week I made a loaf. I was delighted with the result, although I didn’t make the slashes deep enough and it burst (no problem it tasted fine). This weeks loaf was a success and I think I might be hooked on this now!
The recipe is easy to follow and inspires confidence in hopeless cases like myself. It also makes gorgeous bread.
Thank you so much Vanessa!
Have made sourdough quite a few times with very variable results, this recipe worked first time and gave truly excellent results. It was easy to follow, the crust was crispy but not like a tortoise shell (as I have made all too often!). The texture was wonderful and even. Having made “normal” bread many times I found it hard to believe there was no kneading required, but hey it works. In contrast to many recipes I have seen this one shows a clear understanding of the sourdough process, I learned a lot from it – thanks.
I’m trying out ur recipe….am taking it out from the fridge & into the hot oven..
So anxious of the outcome…
Hi Vanessa, I make a loaf of bread every day using your recipe on the internet – it is foolproof and delicious. I now have your book and I can honestly say it is the best cookbook I have ever had – thank you. I have one query though. With reference to the excess starter that accumulates every day, should I keep this in the fridge or leave it on the counter with the starter? By the way, the digestive biscuits (recipe in your book) using the excess sourdough are delicious!
Hi Diana, What a lovely comment. Thank you.
Keep your starter in the fridge. When you refresh you just use a spoon, the rest is discard, so perhaps keep this in another opt unit you are ready to use it. Your refreshed pot sits on the side for 8 hours to really get going — then you use it to make a leaven .. then like cinderella the party is over and it’s back in the fridge.
Happy baking.
Vanessa x
Thanks for your reply. I have been keeping my starter out of the fridge as I tend to bake every day. In the morning I use 40g of it to build the levain; refresh the starter with 40g starter, 40g white/rye flour and 40g water and any starter that is left I put in a separate “excess” pot. This excess I have started to use in your recipes where you refer to “unrefreshed 1 week old” starter. Is it OK to add to it every day and should I keep this excess pot in the fridge until needed? As a matter of interest to other readers, I also add about 5g of diastatic malt to your recipe above and tweaked the flour to 350g white, 100 wholewheat and 45g rye – all organic stoneground. The bread is perfect and has a wonderful flavour. By the way, your article on gut microbes is so interesting and informative – thank you. Diana x
I’m going to try this recipe as my first attempt at sourdough. I’ve bought a 2lb capacity banneton so should I increase the measurements by 50% or will the 1lb dough be ok in the banneton?
Thanks
Brenda
It will be fine.
Made a sourdough starter and fed it over the last two weeks. Followed your recipe this weekend. It’s probably the best bread I’ve ever made. Thank you x
Hi, thanks for this recipe, it’s my first sourdough and going well. I am confused by the baking timings however. I am using a thick metal ‘baking stone’ and I am sure the hour at 220 + 15 mins at 180 is far too long (fan oven on bread setting with max steam being used). I have tried 220 for about 25 min and then 15 – 20 mins at 180. The bread is pretty good, but with a very thick and chewy crust. Can you give your thoughts. How would I get the same loaf, but with thinner crust and slightly less chewy crust?
Hi Stuart,
My recipe uses a cloche. This is so you get the curst as you describe above.
Hope that helps.
Vanessa
Thank you for such a simple and yet fabulous recipe….cannot fault it. 1st time I have tried a sourdough and so pleased with the end result. Wish I could post a pic
Dee, what a lovey comment. Hope you enjoyed your loaf and are now hooked!
Best Vanessa
Hi Vanessa, after stumbling upon your website a while back I have been wanting to try to make my own sourdough. I finally ordered a fresh starter from Bakery Bits which I revived and then this weekend I tried to make my first breads using your basic sourdough recipe. I used Gilchester flour (wholemeal wheat and organic white) and a La Cloche but although my starter was very active the bread ended up being quite flat each time (no oven spring it seems like). The taste and the crust were really great though! I would love to be able to get more of boule shape but have no idea what I’m doing wrong. Do you know what the issue could be?
Many thanks! Floor
Hi Floor – you sound like you are most definitely over proving your bread. Gilchesters is very active and flavoursome and full on as it is full of nutrition and enzymes .. please speed up fermentation times.
Vanessa
Hello,
Thank you for the lovely – easy to follow recipe. Only question I have is when you say “cover with a damp tea-towel” do you mean that the damp cloth is actually touching the dough or is only covering the proving basket/bowl? From my experience the towel sticks a little to the dough if in contact (even when dusted with the flour)… Thanks!
Hi Mary – your bowl needs to be big enough so the towel does not touch the dough. It is there to stop a kin for forming, especially on a dry day or centrally heated house.
Vanessa
SOrry – not sure if my previous comments posted or not.
I was wondering if the 500g or 1kg bannetons are better for this recipe?
Thanks
I use 1kg ones. It is the weight of the dough that counts.
Hi,
This may be a really silly questions but, does this recipe need a 500g or 1kg banneton to prove in?
Thanks!
Dani
Hi Vanessa, how important is the oven temperature for sourdough to rise? Or is it all about the dough? My oven is quite old and I suspect might be losing heat and my bread comes our flat which makes me wonder if the two are related.
Su do use a cloche .. it really makes difference. It will even out the heat and make the most of the heat you have.
Hi Vanessa – recipe looks delicious. What is the recipe for the sourdough starter?! Thanks, Victoria
Hi Vanessa
I’m so excited about giving this sourdough in the next few days, once my starter is ready to use. I’m just wondering what you would advise if I haven’t got a Dutch oven or La Cloche? Would I need to adjust the timing?
Thank you.
I use a big, lidded, ceramic-type casserole dish and it works great.
Hi, I made my first sourdough today, the basic recipe, but I found it hard to shape as it was a little wet, as in, sticky. It cooked fine and looked really good when it was baked. Very rustic looking which is appealing but I was wondering if the dough is supposed to be so wet? My local shop is a coop and I just used their branded flour as I didn’t have another choice. I wondered if the flour was an issue.
Sounds like a flour issue to me. Did you use any wholemeal?
Yes, I made it to the recipe. Since posting I have made this a few times and I reduced the water by 20ml and that helped. Either way, it turned out beautiful and I haven’t bought bread since. My family really love it too. Thanks for the great resource. I want to start experimenting with other recipes but I have been a bit afraid, I know silly, but I’m starting to get a little bit more confident. Thanks again!
Foolproof recipe that I use as the base for all my sourdough baking. I made another loaf using your recipe ( subbed out some white for spelt flour and added pumpkin seeds) this morning and it’s sat on the side now cooling and cracking away. I’m impatiently waiting to be able to cut it. Thanks Vanessa!
Thank you .. I am smiling .. what a lovely comment. Nothing I love more than to hear that someone has been inspired to bake sourdough. welcome to a whole new world.
Vanessa
x
Well you made it so simple! I just wish I could post a photo. I have another I’ve just taken out of the oven, it’s a little lighter on the crust than I would like but sadly my bread knife just isn’t up to the task of the deep brown extra crunchy crusts. Do you have any knife recommendations?
Thanks again
X
I understand your recipe but I have arthritic hands and cannot knead by hand but have a machine with a dough hook, can you give me any hints, tips please.
Please don’t mix or knead .. at all. A long slow fermentation will take care of this. If you email me I will send you a no knead technique ..the gluten will develop anyway. I promise.
Hey, I’ve tried this recipe three times. The bread comes out very tasty but its always rather dense and the crust is very hard. Do you know where i might be going wrong?
Thanks so much, you’re a great resource ?
I suspect it might be the flour you are using. Are you in the UK?
Try using a roller milled flour to begin with as your main flour. Mulino Marino ( see shop on my website) 00 is wonderful. Also Doves Farm flour – it the green bag of strong bread four .. all about 13% protein. I mis that with some local organic stoneground flour for best flavour and added nutritional benefit.
Hi Venessa,
I attempted the recipe and when I left it to autolyse for 2 hours, it turned into a slightly gooey batter slightly thicker than fish and chips batter. I’m trying to figure out what I did wrong.
About the leaven… I keep my starter in the fridge. Do I feed it, leave it out for a few hours to bubble then scoop 2 tablespoons out, to be combined with the 50g of flour and 50g water for the leaven? or can I use 2 tablespoons of the starter straight from the fridge for the leaven?
I live in Singapore and it’s pretty warm in the kitchen, could I have left the dough to autolyse too long?
Thanks in advance for your help.
Looking forward to making some of your awesome looking breads!
Hi – I am guessing it might be a number of factors. Yes temperature is one reason, flour type is another. Try and make sure your scales are accurate too. It think it is more likely to be your flour .. but it is hard to tell from here… I do have a few Students I can ask in Asia, so let me know and I will put you in touch to find out what they are using.
I think you’re right! Tried a different brand of bread flour and it worked great!
Fuss free recipe with dope results. Definitely recommend it! Thank you
Happy baking Juan. x
Hi Vanessa,
I’ve just started a total white flour “starter” as my son is not keen on rye and wholemeal flours. What a pity!
For your basic sourdough recipe can I make the loaf with 500g white flour rather than 100g wholemeal and 400g white?
Thank you.
What a lovely site!
yes you can .. but it might change the feel if the dough which is designed to allow beginner to have a dough that is relatively easy to handle. .. as the hydration is tempered by the wholemeal. which absorbs more of the water .. so if you find the dough hard to handle then just reduce the water by 15 grams.
If I was out and about and wanted to use my breadmaker to knead the dough, can I add ALL the ingredients including the salt solution and then leave it to rise while out. Then I would shape it for the banneton when I get back and leave to rise over night?
Hi Cathy,
It’s been a long time since I baked sourdough in a bread maker .. but I used to work long hours in the city .. in another life .. so as I recall all I did was stir all the ingredients together and transferred to a bread maker. I then set the bread maker on an 8 hour delay. My bread maker has a 5 hour wholemeal setting. I seem to remember that it produced a great family sourdough loaf. I’d mix at 6pm and the bread would be ready at 7am the following morning filling her house with freshly baked sourdough bread smell – just in time for breakfast. You would, however have to check the size of your bread maker and adjust accordingly. Do let me know how you get on!
Vanessa
Made this with my month old starter, which I feed on stoneground rye and plain white flour, and it turned out fantastically! Previously I made the mistake of starting off trying to make really high hydration sourdough breads but decided to try something easier in the end. I let this rise in parchment paper in a tea towel lined colander and then baked it in a preheated Lodge cast iron combo cooker for just under 25 minutes wuth the lid on and then at a lower temp for around another half an hour. To avoid scorching the bottom I put a layer of dried chickpeas on the bottom of the Dutch oven for the bread to rest on. For the last 5 minutes of baking I took the bread out of the Dutch oven and let it go the rest of the way on the oven rack. The oven spring was perfect, and the crust turned out just how I like it – fairly tough, but not too thick and with a nice chewy texture biting into it. This is definitely a keeper! Thank you! 🙂
Lovely to hear!
Happy baking.
Vanessa
x
Hello Vanessa
I’m new to all this and have just begun making my first starter! I would like to find a fairly simple recipe, like the one above, as I hope to make sourdough bread a regular part of my life.
In this recipe, the dough is mixed straight from the fridge, but on another site (cultures for health.com) it says that once starter has been put in the fridge it goes in to ‘hibernation’ and needs to be fed again and used about 4 hours after feeding when it’s at its most active. Does that not really matter?
By the way, I am venturing in to sourdough as I have IBS and am told that the sourdough bread is much easier to digestion. So, would it be ok if I use spelt flour instead of wholemeal?
Kind Regards
Lucy
Hi Lucy,
Lovely that you have found the site and sourdough. If you read the recipe the dough is not mixed straight form the fridge. It does finish proving in the fridge, and it is fine to bake it straight from the fridge, once it is fully proved.
You will also find that longer slower overnight fermentation will help make your sourdough more digestible. There are several articles on the website, including a recent one about spelt and another about sourdough digestibility in relation to IBS.
Hope that helps.
Happy baking.
Vanessa
Afternoon Vanessa. I had a go at your basic recipe and produced a good looking loaf. I was trying your recipe before investing in a Cloche. The dough was proved over night in a colander as I don’t have a round banneton. Once baking was finished the crust was very brown and difficult to slice and more worrying the crumb was ‘rubbery’. As far as I know I followed your instructions to the letter. I should tell you I bake on a non-stick heated flat baking tray. Any idea what caused the crumb so rubbery?
Regards
Chris
I imagine you used a high protein flour, or that you underpriced your loaf. Try to use a 12 – 13 % protein flour, and make sure you give your loaf time to prove.
Thanks Vanessa for the advice. Purchased the lower protein flour you suggested and the next bake was certainly better.
I just made this with my three-week-old sourdough starter and it’s probably the best bread I’ve ever made. Previous problems — crust too light, crust too tough, crumb too cakey, crumb too wet — all gone away. The crust was perfect, crusty and crackly. I cooked it (and mixed it and proved it) in my Lekue silicone bread maker and after just 45 minutes @ 220°C it was deep brown so I didn’t bake any further. This is definitely one I will do again.
What a lovely comment! Thank you for sharing .. happy baking.
Hi
Your sourdough starter was a 1:1 mix of All purpose flour and water or it had any portion of whole wheat flour. I want to try this recipe nut I have a 100% hydration starter with equal. Quantities pf dloir and water.
Can you please suggest me.
any 100% hydrated starter will be fine. IN fact any starter .. just make sure you make a leaven!
As Hugh Fearnley-Whittingstall might himself say… https://www.theguardian.com/lifeandstyle/2013/may/10/hugh-fearnley-whittingstall-recipes-sourdough
Hi Vanessa,
My last few loaves have spread out when removed from the banneton and when baked, look rather wide and flat (though still taste good!) I’ve moved from baking in a Le Creuset to a cloche but I was wondering where in the process I might be going wrong / what I can do to get a better shaped loaf?
Thank you very much
Hello Henrietta, you have probably over proved the dough. This may be because your fridge temperature is too high – try and find a cold spot. V
Just used this recipe after 2 previous failed attempts with others, it worked perfectly thank you!
Bake for 1 hour at 220?C then an extra 15 mins at 180?C?
Just checking: most other recipes I’ve used have timings around 35/45mins. My attempts have always passed the ‘Tap’ test at these timings so your’s caught my eye. Does the crust just get thicker and thicker the longer the baking time?
I’ll give it a go but just wanted some newbie reassurance.
Hi Ian, yes the instructions are correct.. but please use a cloche or a Dutch oven. You can of course bake it for slightly less time, and this is fine, but I like my crusts and I was brought up on bread that came out of a wood fired oven, so I love dark thick crusts and a soft moist bouncy crumb… but it’s personal preference.
Happy baking.
Vanessa
Bake for 1 hour at 220?C the an extra 15 mins at 180?C?
Just checking: Most other recipes I’ve used have timings around 35/45mins. My attempts have always passed the ‘Tap’ test at these timings so your’s caught my eye. Does the crust just get thicker and thicker the longer the baking time?
I’ll give it ago but just wanted some newbie reassurance.
The recipe looked correct and it turned out perfect. Thanks
I have to say that this is one easy-to-follow and foolproof recipe. I have been trying to make proper sourdough for ages, and this (combined with La Cloche) have given me *exactly* what I was looking for in a loaf. I was worried that it was looking a little wet, but it turned out perfectly. Thank you so much!
Hi Paul,
That is great to hear. There is also a Facebook page called The Sourdough Club where lots of people swap photos and information .. so if you have got any pictures to share we’d love to see them.
Best
Vanessa
Thanks! One more question. Is it okay to let the bread proof in the fridge longer than 12 hours? Maybe 15-16?
Can’t wait to try this. Although I’m confused – with every other recipe I’ve read says during the autolyse stage you aren’t supposed to add the salt, as it dries all the moisture out of the dough and makes it stiff. Is this true or false?
Hi Jenna,
You are correct. A true Autolyse adds the salt in just after the Bulk fermentation.
Kind regards
Vanessa
After battling to get an open crumb this method was a god send ! Simple and easy but gives a wonderful light open crumb . Thank you !
Hi Naomi,
Lovely to hear!
Vanessa
x
Hello again,
Just received my starter and wondering if I use 100g of the actual starter (after the 3 feeds) or do I need to make a leaven with it for the basic recipe please? Thanks very much
Leaven basically is a 100% hydration starter. Provided your starter has approximately the same proportions of flour as the leaven, it won’t make any difference.
My way of getting a really good crust is to spray the loaf all over with water using a fine plant spray – after slashing. It never fails.
Hello! I tried this recipe a while ago and it turned out really good. I’ll do it again tomorrow — this time I’ll use my cloche (first time it was on a baking stone) — but the question I have is, do I still need a pan of boiling water if I use a cloche? Wouldn’t the cloche lid prevent the steam from entering in?
I know that in this recipe it says I still need that, but on Bakery Bits I found another of your recipes (the Friday night sourdough) where there is no mention of using boiling water or ice cubes to create steam — hence my question.
Hi Louise,
Gosh no .. the steam is only if you use a baking stone. The cloche teams the steam from the bread as it bakes, so no need for a pan of water.
Happy baking.
Vanessa
x
Hello, can I prove for 4 hours in a warm room instead of the fridge. Am I right in saying that you don’t really knead this bread very much? Thanks.
Yes it is a no knead technique, and yes a normal room temperature is fine.
Just got into making bread at home and have now discovered sourdough and was wondering if instead of baking in an oven if it can be made in a breadmaker?
You can make sourdough in the bread maker. I used to use a bread maker about 8 years ago when I have three children under the age of 4!
Pop all the ingredients in the maker and mix. Put the timer on and delay of 5 hours.. you should find your bread maker will do the rest.
Hope that helps.
I live in a small NZ town with no decent bakery, so have been baking my own sourdough for the last eight odd years. Stumbled across this recipe and gave it a go.
Remarkably easy to follow, and stupendously good results (baked in dutch oven). The following times I have paid less attention to the timings except for baking times, and the result is always what I’d call the perfect loaf; crusty, fragrant, great crumb and delicious.
Thanks so much
Hi Steve,
What a lovely message. Thank you. I’d love to see a photo if you fancy sending one?
Best Vanessa
So using the Dutch oven did you bake for an hour fifteen still ?
Thanks in advance
I am a sourdough newbie but managed to produce a very acceptable boule using your recipe. My 17-year-old daughter said it tasted like the artisan bread we enjoyed on Gozo earlier this year.
I made my own starter from organic stone-milled flour and used 200g, but adjusted the dry flour and water to compensate. I was very dubious about proving the dough in the fridge but you obviously know what you are talking about! Many thanks for a simple and easy-to-follow recipe with a delicious result!
Hi Vanessa! Many thanks for this recipe which I’ve used with good results. Just for clarification, do you mean to bake for an hour at 220 degrees and then a further 10-15 minutes at 180 degrees, 85-90 minutes in total?
Sorry it is basically an hour in the cloche and then the last 10 – 15 minutes is really about getting the crust to the level of darkness you like.
The initial high temperature is about getting the maximum oven spring. The lower 180 is time to cook the inside of the loaf and the last 10 – 15 is about the final crumb colour.
Does that help?
Vx
Just the business – many thanks!
Thanks for the clarification as I also thought the baking temperature was 220 and I ended up with a very thick crust and overbeaked loaf. I’m making one again, so I’m so glad that I went through these comments to find this one. Let’s hope this time it turns out beautiful!
Hi
I’m just doing my first one and I don’t find the clarification here clear. Is it 1hr 15 in total with 1 hr at 220 and 15mins at 180? That’s how I’m reading the instructions but the comments and your answer suggest that that might not be the case.
Thanks for your help!
P
yes . but every one has different ovens so use your judgement too.
Hello! If i am baking in a tin, should I also bake at 220 for an hour? This will be my third go at this recipe, I’m loving it but finding the crust ends up very dense.
Thanks,
Sam
Reduce baking time to suit you .. and wrap in a tea towel whilst warm to soften crusts.
I have just made a loaf from you basic recipe and it has to be the best one I’ve ever made!
It has the most delicious flavour and the crust is to die for. I found it hard to slice, so I’m wrapping it in a tea towel and will try again tomorrow.
Thank you for for the recipe. I live in Australia so cannot get to any of your courses unfortunately.
Janet – what a wonderful message. I’d love to see a photo .. and I have the Sourdough club pages if you are on Facebook.
Vanessa
x
That’s great news that there’s a FB page. I too am in Australia and beginning my sourdough journey. My first 2 rounds didn’t work…one didn’t rise, the other stuck dreadfully to my floured tea towel in the colander, so I’m about to go for a third try. I’ve been told the mother gets better with age, so fingers crossed. Thankyou for sharing difficult insights across the globe.
Always love a new sourdough recipe, as they all are different and it can take a while to perfect making a loaf. A question I have is about the wetness of the starter, some recipes I have tried end up too wet, as I think they are intended for a dryer starter. I am now experimenting with less water to flour ratio in my starter but was wondering what you would suggest..
Do you put the stone in when you turn on the oven, or do you put it in after the oven is heated, and put the dough to bake on the stone that will then heat up as the bread bakes?
Yes pre heat the stone.
Im gearing up to try my first Sourdough loaf using your recipe, tips etc. I would like to know if the final prove in the fridge 8-12 hours can be extended. I’m a shift worker and having a looser timing schedule would really help
Thank You
Annie
Hi Annie,
Many people prove their sourdough for much longer. Generally the longer the prove the more sour. In fact I visited a bakery just last week who prove for 17 hours in the fridge. Just check the temperature of your fridge is between 3-5 degrees as a warmer fridge temperature might result in over proving.
Vanessa
Does it make any difference autolysing just the flour and water before adding the starter?
Hi Graham, Sometimes if I have a heavy flour, such as a whole rye or wholegrain stoneground one then I find this is a useful technique.
Seems like a very accessible recipe. One question, after proving overnight, how long do you need to leave the dough outside of the fridge before baking, assuming pre-heated oven? Or can it go in straight away?
I bake it straight from the fridge.
Very helpful…thanks indeed Vanessa
I have made this once and am making it again tonight. I found the dough did not rise in the fridge and I kept it at room temp for several hours after that when it did rise. How much should it rise before baking? Thanks
It needs to rise by about 50% – try starting a but earlier in the day if you are not having the time to let it rise.
Thank you
Hi, a question from a completely new baker. When you say place a large bowl of boiling water underneath I assumed this to mean stand the baking tin in the water. But someone else says it should have been on a lower shelf… Please clarify . oh and when it’s left to cool down, do I just turn it out of the tin onto a wooden board?
I’m new to bread baking, encouraged by and recommended to your website by a friend. I was going to buy a bread making machine! Let’s hope I succeed.
Hi Richard. I turn my breads out onto a wire rack.
No – the tin is just under the bake. All Boules though need to go in a cloche. In which case you don’t need the water as it is self steaming.
Let me know how you get on.
best Vanessa
Why don’t you knead the bread at the beginning?
I mix really well and gluten forms overtime anyway so kneading is a bit pointless.
Use some potato flour to dust you banneton with. It also sounds like you are over prooving.
Did you refresh your starter and the make leaven?
Yes, I refresh it every day. And I mixed a table spoon of it with 50g flour and 50g water. After mixing with flour I leave it for about 2.5 hours before I add salt mixture. After folding this 3 times I prove in the fridge over night or about 12 hours at about 4degrees.
Yes the leaven was refreshed as per the instructions three times, and was quite lively. I dusted the bannaton very well with the Soffiat 00 flour and the dough dropped out quite easily. I put the dough in the fridge at 9.30 the previous night and removed it at 8am and put it into the hot oven at 9am when it had reached temperature. I would say that I did find the dough quite heavy to work and wonder whether it needed more liquid in the mix although I followed the recipe to the letter. Many thanks for you very prompt reply. Wendy.
It really is dependent on your flour .. it like saying I’m driving a car how fast does it go? Just make minor adjustments to the hydration to find what suits your flour …
Hi Vanessa,
I tried a number of different recipes but this one was the first that truly worked for me. I am using a terra cotta Roemertopf and it seems to help to keep the dough in shape and I get nice oven spring but can only make smaller loaves due to size of the Roemertopf. However, when I used today a MasonCash terracotta base with a dome to create a bigger loaf, the dough seems to loose it’s shape when transfering out of the proofing basket. The crust is till very crunchy and the bread still edible with sourdough type holes in it but it just is on the flat side. Is this due to overproofing or what could be the reason? I try to create enough tension when I shape the dough or do you think this is the problem?
It sounds like your starter needs ramping up a bit ..
refresh your starter before baking
Hi Vanessa,
Love French, Italian and Greek breads. Your recipe sounds very simple and comments/tips are very helpful indeed. As I am trying to learn the soughdough technique, was wondering whether I could leave the dough at room temperature (atound 17-18C) for 8 hours instead of keeping it in a fridge? Furthermore, for a month now, I have been feeding my starter with rye and whole meal flour every 12 hours (50gr water + 50gr flour+ 50gr remaining starter) . Hence I want to know whether instead of making leaven I could add 100gr of my starter? I. e. 8hours after last fed? Many thanks. P. S. Btw it would be amazing idea to publish a book with recipes and techniques for soughdough bread in bread makers.
Hi Greg that book is out next week.
Hard to tell about your questions as I am nit in your kitchen and have no idea of your ambient temperature of flour .. but have a go!
Best Vanessa